Tomten Well Underway
I’m still cranky about the Bohus, so decided to try to catch up to Jared on the Tomten. He got a lot done while I was on vacation, especially considering his gauge is smaller. With just a couple of evenings at it, I’m already on the hood, with just that to finish and the sleeves to go. Oh, and that gigantic red garter front edge.
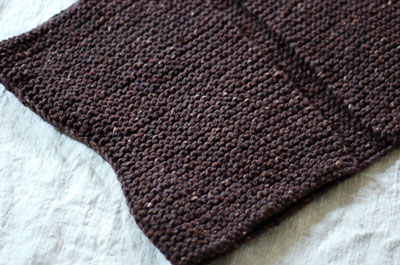
I’ve made some changes to the pattern in the name of fit. First, I cast on 120 sts. instead of 112. I added waist shaping borrowed from a favorite North Face hooded jacket. The shaping is at the side “seams”. I just decreased a few times, knit straight a couple of inches, and increased back up to the magic 120 sts.
After that, I put an underarm gusset in and reduced the depth of the armholes, hoping to get rid of the big blob of fabric that comes from having those deep arms. To make the gusset, I increased at the side seams, at the same rate as the increases for the waist (every 2 ridges), starting a few inches below the underarm cast off. I did 3 increases, giving me about a 2 inch increase in width. She’s just a little gusset. The sleeves will be sewn to the body like usual, only the seams will be a little longer. The ease created by the gusset will hopefully allow the narrower sleeve to still be comfy with a full range of mobility.
A fake seam was added to the sides, which causes a sharp fold that’s really attractive plus adds structure. As I was casting off the underarms, I stopped at the center stitch and let it unravel to the bottom. On the first side, I let it drop ALL the way down. Knitted cast on + dropped stitches = un-knitted cast on. Whoops! After dropping that single stitch, I knit it back up, all knit stitches, two at a time, with a crochet hook. The usual fake seam is done at a rate of 2 stitches, then 1 stitch, then two again, but with garter, it’s two at a time. It looks nice and tidy and does its job perfectly.
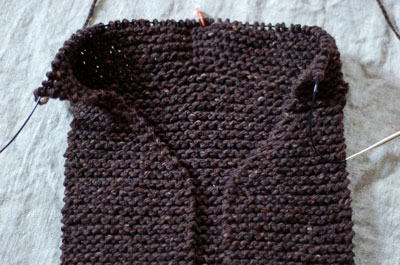
I also added a v-neck in an attempt to prevent the giant hood problem. Instead of 15 sts. on each front, there are only 6. When I add the garter stitch button band, which I can adjust the depth of as needed, the hood will hopefully be a perfect depth. Seeing as how I completely winged this bit, I’ve got some serious finger crossing to do! Let’s also hope the V is not so severe that the garter stitch edging buckles or bumps. I don’t want to do any kind of mitre, mainly out of sheer laziness, but also from a desire for simplicity.
I’m so very glad I tried the jacket on when I was ready to join the fronts to the back and start the hood. With this chunky yarn and garter stitch, the jacket weighs a lot and stretches bigtime. The armholes were definitely too deep once the jacket was hanging, so a few rows were ripped. If you make this sweater, definitely stop and try it on!
Keep your fingers crossed I don’t run out of yarn, will ya? I never thought I’d need more than 2.5 lbs. of yarn for this, but I am halfway through that already. Yikes!
Thanks so much for all your comments on the Ireland photos and my vacation in general. Boy, it kind of stinks coming back and having to cook and clean and work again. :)
